
앱에서 자주 사용하는 Facebook, Kakao, Google, Naver 로그인 예제를 만들어 봅니다.
Index
1.Facebook
1)페이스북에서 내앱 만들기
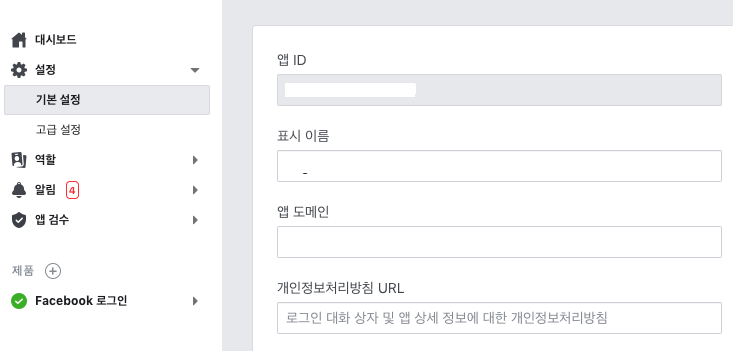
설정 - 기본설정에서 앱ID를 복사해 놓습니다.
개인정보처리방침 URL과 앱아이콘등을 입력합니다.
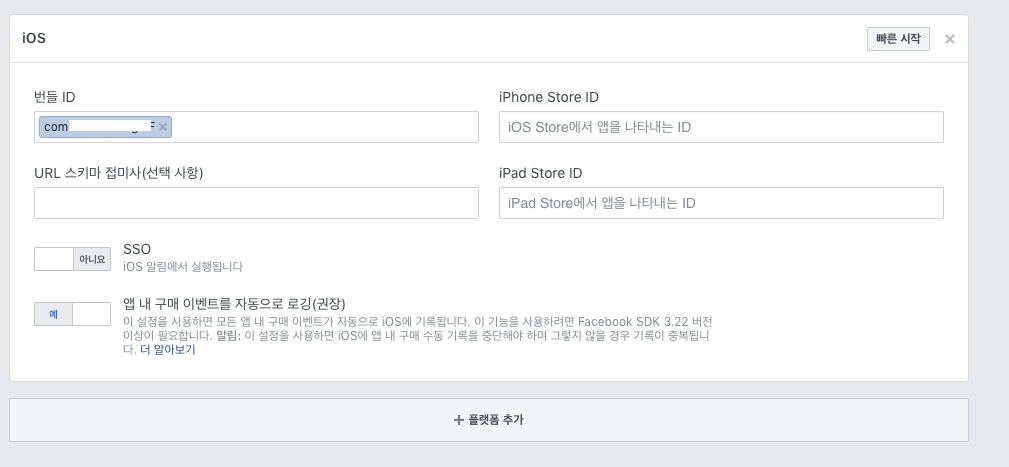
플랫폼 추가를 한뒤 번들을 입력합니다.
2)FBSDKLoginKit 설치
pod 'FBSDKLoginKit'
Cocoapods로 FBSDKLoginKit을 install 합니다.
3)info.plist 설정
<key>CFBundleURLTypes</key>
<array>
    <dict>
        <key>CFBundleURLSchemes</key>
        <array>
            <string>fb앱ID</string>
        </array>
    </dict>
</array>
<key>FacebookAppID</key>
<string>앱ID</string>
<key>FacebookDisplayName</key>
<string>앱네임</string>
<key>LSApplicationQueriesSchemes</key>
<array>
    <string>fbapi</string>
    <string>fb-messenger-share-api</string>
    <string>fbauth2</string>
    <string>fbshareextension</string>
</array>
info.plist에 추가를 합니다. 앱ID와 앱네임은 자기꺼로 바꿔서 하면 됩니다.
4)AppDelegate 설정
AppDelegate.swift 파일에서 FBSDKLoginKit를 임포트 합니다.
import FBSDKLoginKit
application(_:didFinishLaunchingWithOptions:) 함수에 아래와 같은 코드를 추가합니다.
func application(_ application: UIApplication, didFinishLaunchingWithOptions launchOptions: [UIApplication.LaunchOptionsKey: Any]?) -> Bool {
    // Override point for customization after application launch.

    FBSDKApplicationDelegate.sharedInstance().application(application, didFinishLaunchingWithOptions: launchOptions)

    return true
}
applicationDidBecomeActive(_:) 함수에 FBSDKAppEvents.activateApp()를 추가합니다.
func applicationDidBecomeActive(_ application: UIApplication) {
    // Restart any tasks that were paused (or not yet started) while the application was inactive. If the application was previously in the background, optionally refresh the user interface.

    FBSDKAppEvents.activateApp()
}
그리고 로그인 또는 공유 액션을 수행할때 SDK에서 네이티브 Facebook 앱의 결과를 처리할수 있게 코드를 추가합니다.
func application(_ app: UIApplication, open url: URL, options: [UIApplication.OpenURLOptionsKey : Any] = [:]) -> Bool {
    guard let scheme = url.scheme else { return true }
    if #available(iOS 9.0, *) {
        let sourceApplication: String? = options[UIApplication.OpenURLOptionsKey.sourceApplication] as? String
        if scheme.contains("fb") {
            return FBSDKApplicationDelegate.sharedInstance().application(app, open: url.absoluteURL, sourceApplication: sourceApplication, annotation: nil)
        }
    }
    return true
}

func application(_ application: UIApplication, open url: URL, sourceApplication: String?, annotation: Any) -> Bool {
    guard let scheme = url.scheme else { return true }
    if scheme.contains("fb") {
        return FBSDKApplicationDelegate.sharedInstance().application(application, open: url.absoluteURL, sourceApplication: sourceApplication, annotation: annotation)
    }
    return true
}
application(_:open:sourceApplication:annotation:)함수는 iOS 9.0버전 이후에는 Deprecated 되었습니다.
자신의 앱이 iOS 9.0버전 이상만 지원한다면application(_:open:sourceApplication:annotation:)함수를 적지 않아도 되지만 9.0 이전 버전을 지원한다면 함수를 적어야 합니다. Apple
5)Facebook login
페이스북 버튼 등을 터치했을때 메서드에
FBSDKLoginManager().logIn(withReadPermissions: ["public_profile", "email", "user_birthday", "user_gender"], from: self, handler: { (result, error) in
    guard let result = result, error == nil && !result.isCancelled else {
        print("error: \(error)")
        // 로그인 취소/에러
        return
    }
    FBSDKGraphRequest(graphPath: "me", parameters: ["fields": "id, name, email, picture, birthday, gender"]).start(completionHandler: { (connection, result, error) -> Void in
        print("error: \(error)")
        if (error != nil) {
            // 로그인 에러
            return
        }
        guard let facebook = result as? [String: AnyObject] else { return }

        let token = facebook["id"] as? String
        let name = facebook["name"] as? String
        let email = facebook["email"] as? String
        var profile = ""
        if let picture = facebook["picture"] as? [String: AnyObject], let data = picture["data"] as? [String: AnyObject] {
            profile = data["url"] as? String ?? ""
        }
        let largeProfile = "https://graph.facebook.com/\((token ?? ""))/picture?type=large"
        let gender = facebook["gender"] as? String
        var birthdayDate: Date?
        if let birthday = facebook["birthday"] as? String, birthday != "" {
            let dateFormatter = DateFormatter()
            dateFormatter.dateFormat = "MM/dd/yyyy"
            birthdayDate = dateFormatter.date(from: birthday)
        }

        print("token: \(token)")
        print("name: \(name)")
        print("email: \(email)")
        print("profile: \(profile)")
        print("largeProfile: \(largeProfile)")
        print("gender: \(gender)")
        print("birthdayDate: \(birthdayDate)")
    })
})
token: Optional("***********")
name: Optional("Kim Gwan Ho")
email: Optional("pikachu77769@gmail.com")
profile: https://platform-lookaside.fbsbx.com/platform/profilepic/?asid=1081468991941206&height=50&width=50&ext=1547718902&hash=AeRuZEjoxS7zHkkb
largeProfile: https://graph.facebook.com/1081468991941206/picture?type=large
gender: Optional("male")
withReadPermissions의 user_birthday랑 user_gender
parameters의 birthday, gender는 페이스북의
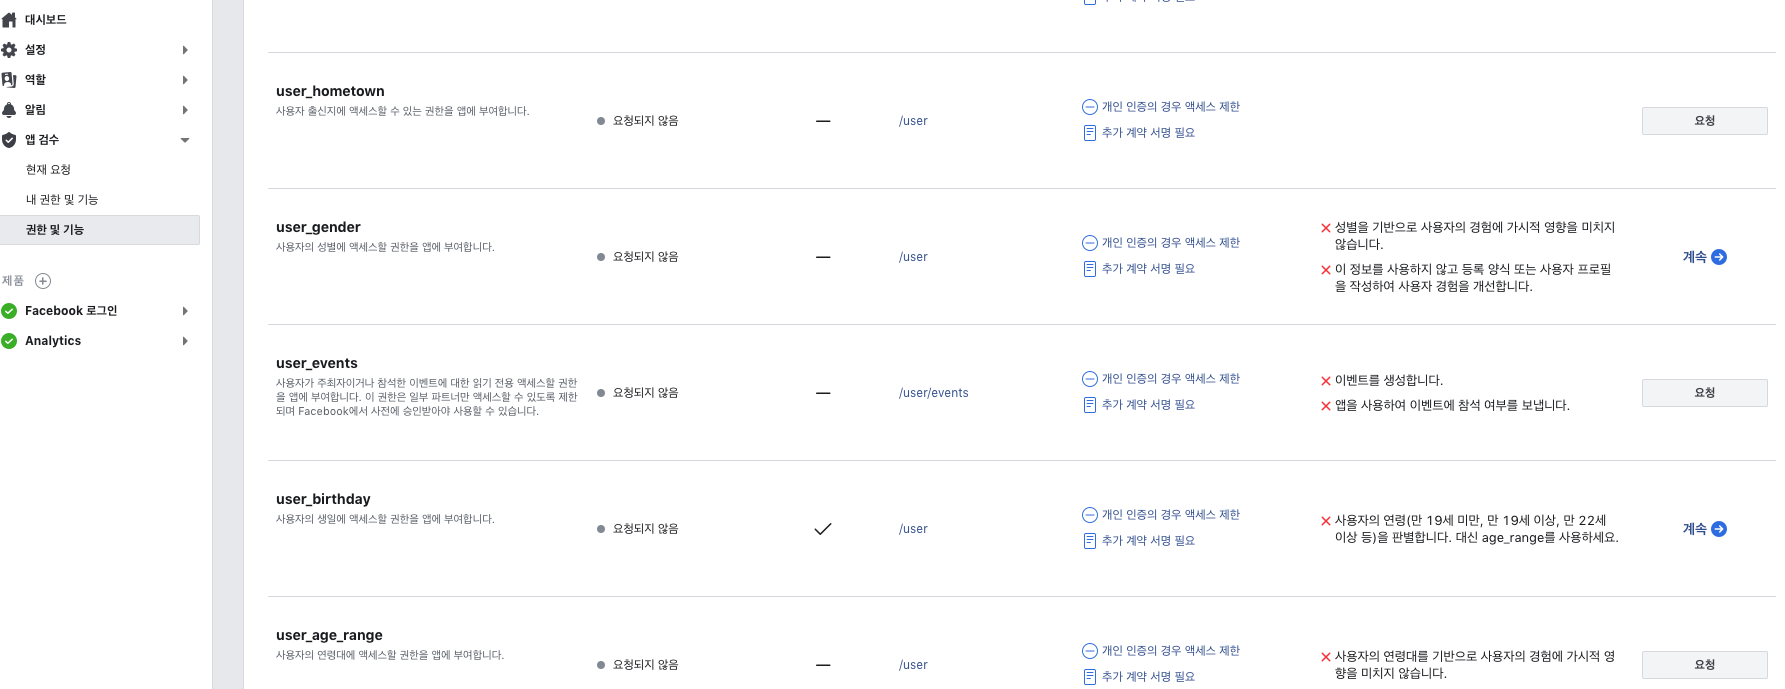
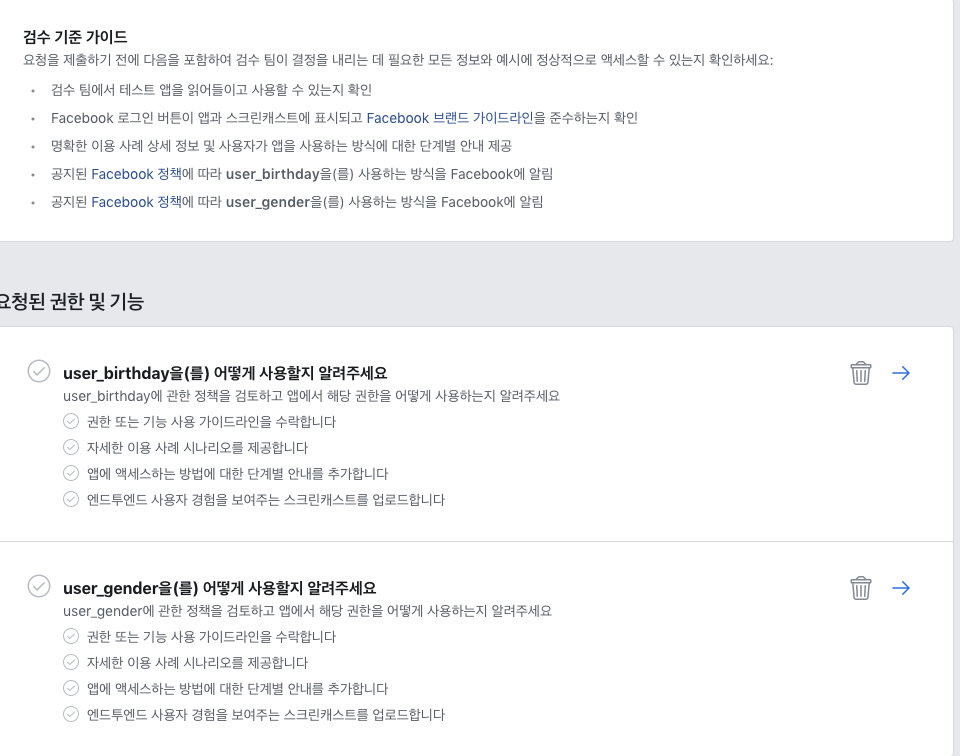
추가 권한을 획득하여야 일반 사용자들이 사용할수 있습니다.(관리자나 개발자, 테스터는 사용가능.)
2.Kakao
1)카카오에서 앱 만들기

설정 - 일반에서 플랫폼 추가로 iOS를 추가한뒤 네이티브 앱 키를 복사해 놓습니다.
2)SDK 설치
iOS SDK 에서 Full SDK Binary & Samples를 다운받고 알집을 푼 뒤 KakaoOpenSDK.framework를 프로젝트에 추가합니다.
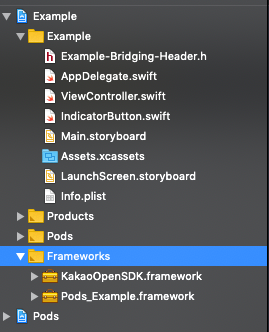
Bridging-Header를 추가합니다.
추가하는 방법은 NewFile에서
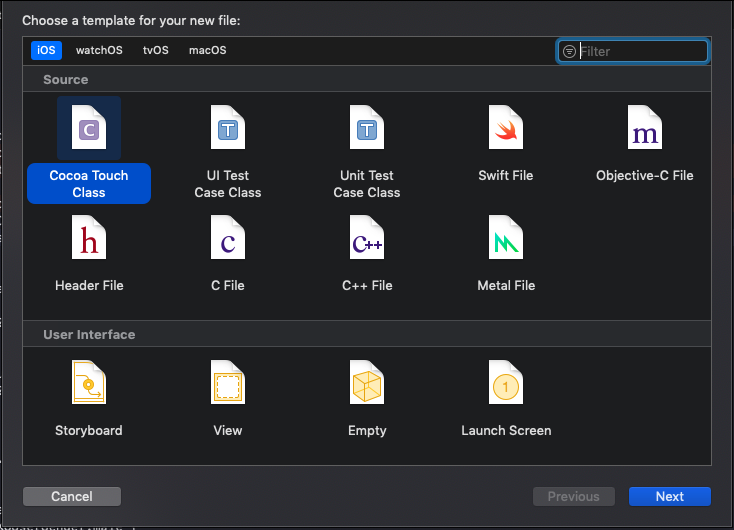
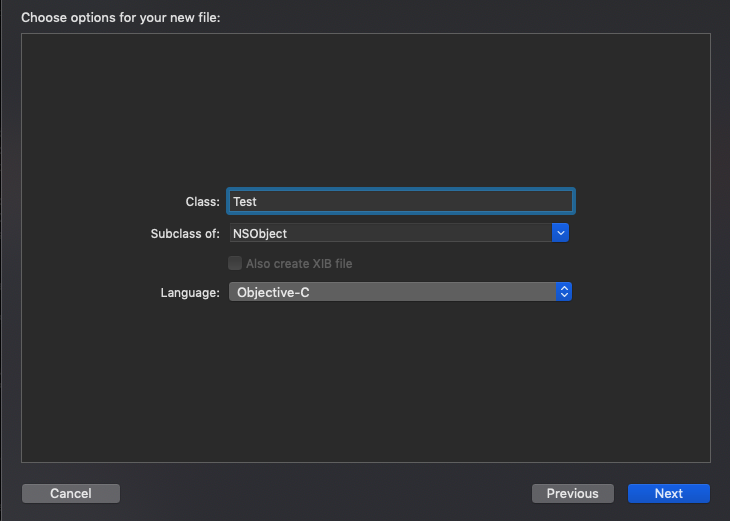
Language를 Objective-C를 하고 Next를 하면
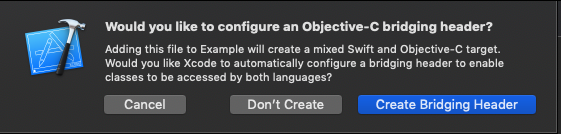
이 창이 나오는데 Create Bridging Header 를 누르면 간편하게 만들수 있습니다.
Bridging Header파일에서
#import <KakaoOpenSDK/KakaoOpenSDK.h>
를 적어줍니다.
3)info.plist 설정
<key>CFBundleURLTypes</key>
<array>
    <dict>
        <key>CFBundleTypeRole</key>
        <string>Editor</string>
        <key>CFBundleURLSchemes</key>
        <array>
            <string>kakao네이티브앱키</string>
        </array>
    </dict>
</array>
<key>KAKAO_APP_KEY</key>
<string>네이티브앱키</string>
<key>LSApplicationQueriesSchemes</key>
<array>
    <string>kakao네이티브앱키</string>
    <string>kakaokompassauth</string>
    <string>storykompassauth</string>
    <string>kakaolink</string>
    <string>kakaotalk-5.9.7</string>
    <string>storylink</string>
</array>
info.plist에 추가를 합니다. 네이티브앱키는 자기꺼로 바꿔서 하면 됩니다.
4)AppDelegate 설정
applicationDidBecomeActive(_:) 함수에 KOSession.handleDidBecomeActive()를 추가합니다.
func applicationDidBecomeActive(_ application: UIApplication) {
    // Restart any tasks that were paused (or not yet started) while the application was inactive. If the application was previously in the background, optionally refresh the user interface.

    KOSession.handleDidBecomeActive()
}
그리고 로그인 또는 공유 액션을 수행할때 SDK에서 Kakao 앱의 결과를 처리할수 있게 코드를 추가합니다.
func application(_ app: UIApplication, open url: URL, options: [UIApplication.OpenURLOptionsKey : Any] = [:]) -> Bool {
    guard let scheme = url.scheme else { return true }
    if KOSession.isKakaoAccountLoginCallback(url.absoluteURL) {
        return KOSession.handleOpen(url)
    }
    return true
}

func application(_ application: UIApplication, open url: URL, sourceApplication: String?, annotation: Any) -> Bool {
    guard let scheme = url.scheme else { return true }
    if KOSession.isKakaoAccountLoginCallback(url.absoluteURL) {
        return KOSession.handleOpen(url)
    }
    return true
}
KOSession 코드를 넣고 실행을 했다가
이런 에러를 볼수 있습니다.
Build Settings에서 OtherLinkerFlags에 -all_load를 추가하면 됩니다.
5)Kakao login
카카오 버튼 등을 터치했을때 메서드에
if KOSession.shared().isOpen() { KOSession.shared().close() }
KOSession.shared().presentingViewController = self

func profile(_ error: Error?, user: KOUserMe?) {
    guard let user = user,
        error == nil else { return }

    guard let token = user.id else { return }
    let name = user.nickname ?? ""

    if let gender = user.account?.gender {
        if gender == KOUserGender.male {
            print("male")
        } else if gender == KOUserGender.female {
            print("female")
        }
    }

    let email = user.account?.email ?? ""
    let profile = user.profileImageURL?.absoluteString ?? ""
    let thumbnail = user.thumbnailImageURL?.absoluteString ?? ""

    print(token)
    print(name)
    print(email)
    print(profile)
    print(thumbnail)
}

KOSession.shared().open(completionHandler: { (error) in
    if error != nil || !KOSession.shared().isOpen() { return }
    KOSessionTask.userMeTask(completion: { (error, user) in
        if let account = user?.account {
            var updateScopes = [String]()
            if account.needsScopeAccountEmail() {
                updateScopes.append("account_email")
            }

            if account.needsScopeGender() {
                updateScopes.append("gender")
            }

            if account.needsScopeGender() {
                updateScopes.append("birthday")
            }
            KOSession.shared()?.updateScopes(updateScopes, completionHandler: { (error) in
                guard error == nil else {
                    return
                }
                KOSessionTask.userMeTask(completion: { (error, user) in
                    profile(error, user: user)
                })
            })
        } else {
            profile(error, user: user)
        }
    })
})
male
********
김관호
pikachu987@naver.com
http://mud-kage.kakao.co.kr/14/dn/btqeCxDLpgU/DpCl6YYgNzSwWKz2CU8dO1/o.jpg
http://mud-kage.kakao.co.kr/14/dn/btqeCdyElA4/3i8HMTQfSdCkjXo3rb2PI1/o.jpg
email과 gender, birthday는 카카오의
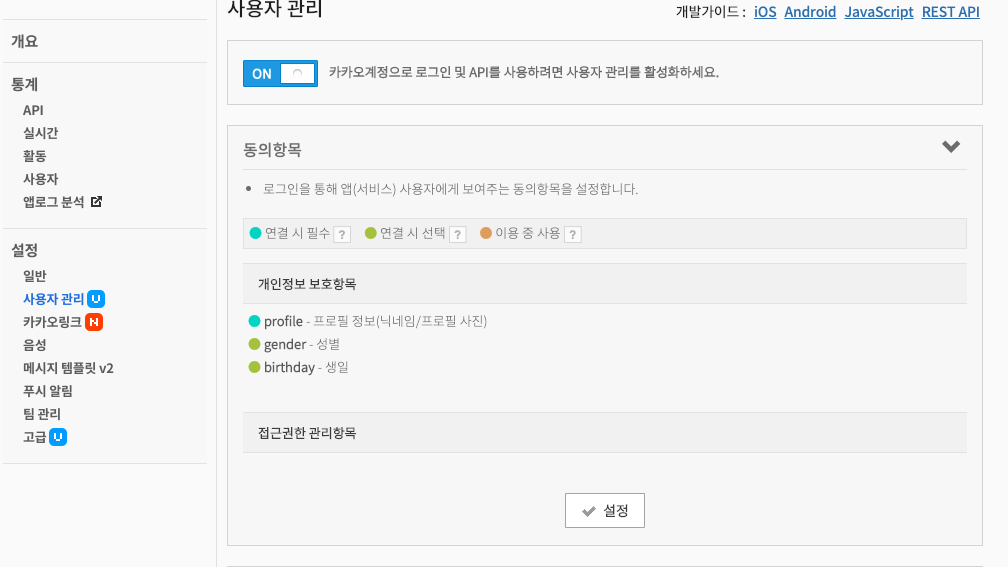
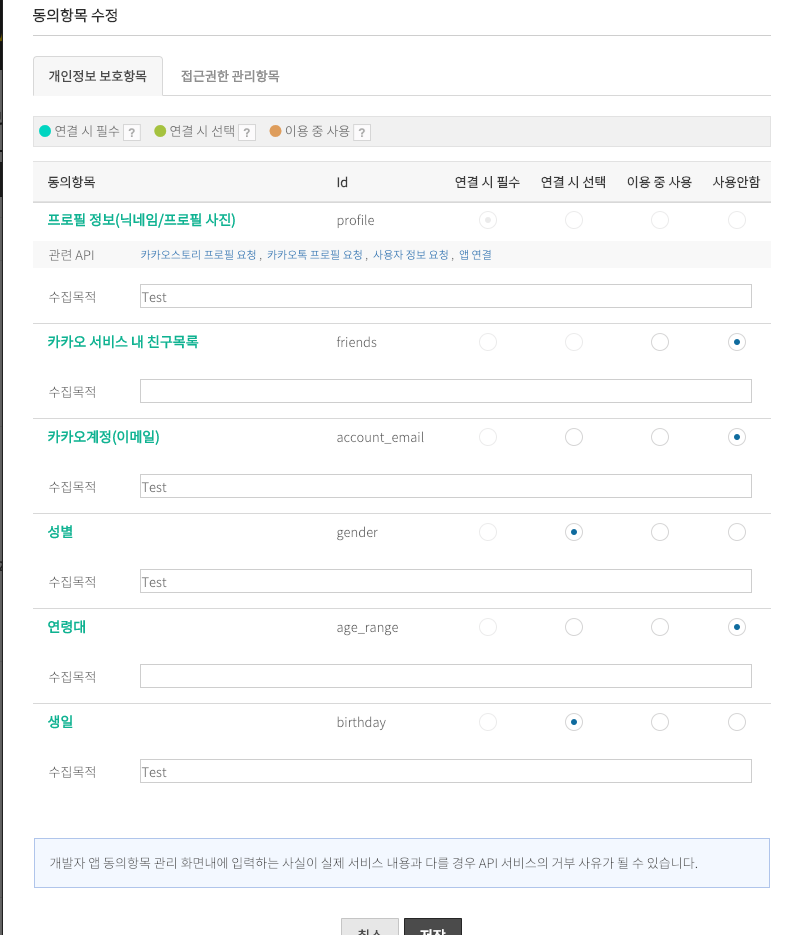
추가 권한을 획득하여야 일반 사용자들이 사용할수 있습니다.
추가권한을 요청하는 부분은 KOSession.shared()?.updateScopes 입니다.
3.Google
1)구글에서 내앱 만들기
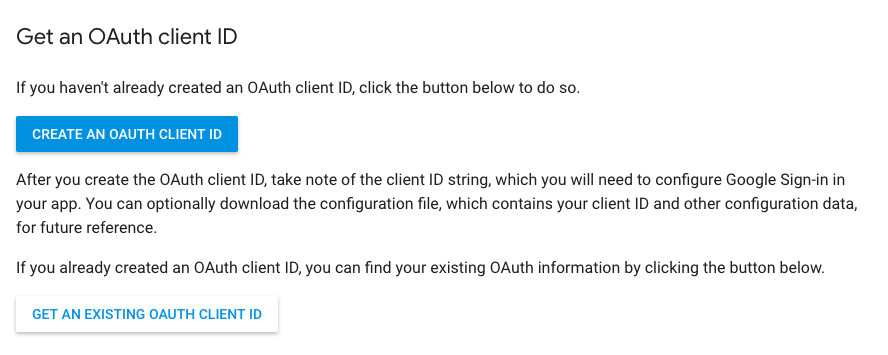
CREATE AN AUTH CLIENT ID를 누르고 프로젝트를 설정합니다.
콘솔에서 사용자 인증 정보에서 OAuth 2.0 클라이언트 ID를 복사합니다.

2)GoogleSignIn 설치
pod 'GoogleSignIn'
Cocoapods로 GoogleSignIn을 install 합니다.
3)info.plist 설정
<key>CFBundleURLTypes</key>
<array>
  <dict>
    <key>CFBundleTypeRole</key>
    <string>Editor</string>
    <key>CFBundleURLSchemes</key>
    <array>
      <string>com.googleusercontent.apps.clientID</string>
    </array>
  </dict>
</array>
info.plist에 추가를 합니다. clientID는 자기꺼로 바꿔서 하면 됩니다.
(com.googleusercontent.apps.***********)
4)AppDelegate 설정
AppDelegate.swift 파일에서 GoogleSignIn를 임포트 합니다.
import GoogleSignIn
application(_:didFinishLaunchingWithOptions:) 함수에 아래와 같은 코드를 추가합니다.
func application(_ application: UIApplication, didFinishLaunchingWithOptions launchOptions: [UIApplication.LaunchOptionsKey: Any]?) -> Bool {
    // Override point for customization after application launch.

    GIDSignIn.sharedInstance().clientID = "clientID"

    return true
}
clientID는 자기꺼로 바꿔서 하면 됩니다.
(***********.apps.googleusercontent.com)
그리고 로그인 또는 공유 액션을 수행할때 SDK에서 네이티브 Facebook 앱의 결과를 처리할수 있게 코드를 추가합니다.
func application(_ app: UIApplication, open url: URL, options: [UIApplication.OpenURLOptionsKey : Any] = [:]) -> Bool {
    guard let scheme = url.scheme else { return true }
    if #available(iOS 9.0, *) {
          if scheme.contains("com.googleusercontent.apps") {
              return GIDSignIn.sharedInstance().handle(url as URL?,
                                                       sourceApplication: options[UIApplication.OpenURLOptionsKey.sourceApplication] as? String,
                                                       annotation: options[UIApplication.OpenURLOptionsKey.annotation])
          }
    }
    return true
}

func application(_ application: UIApplication, open url: URL, sourceApplication: String?, annotation: Any) -> Bool {
    guard let scheme = url.scheme else { return true }
    if scheme.contains("com.googleusercontent.apps") {
        return GIDSignIn.sharedInstance().handle(url, sourceApplication: sourceApplication, annotation: annotation)
    }
    return true
}
5)Google login
구글 버튼 등을 터치했을때 메서드에
GIDSignIn.sharedInstance()?.delegate = self
GIDSignIn.sharedInstance()?.uiDelegate = self
GIDSignIn.sharedInstance()?.signIn()
GIDSignIn.sharedInstance의 delegate와 uiDelegate을 연결한 클래스에
extension ViewController: GIDSignInDelegate {
    func sign(_ signIn: GIDSignIn!, didSignInFor user: GIDGoogleUser!, withError error: Error!) {
        if let error = error {
            print("사용자가 로그인 취소, \(error)")
            return
        } else if let user = user {
            print("userID: \(user.userID)")
            print("idToken: \(user.authentication.idToken)")
            print("name: \(user.profile.name)")
            print("email: \(user.profile.email)")
        }
    }
}

extension ViewController: GIDSignInUIDelegate {
    func sign(_ signIn: GIDSignIn!, dismiss viewController: UIViewController!) {
        viewController.dismiss(animated: true, completion: nil)
    }
    func sign(_ signIn: GIDSignIn!, present viewController: UIViewController!) {
        self.present(viewController, animated: true, completion: nil)
    }
}
userID: Optional("**********")
idToken: Optional("***********")
name: Optional("김관호")
email: Optional("pikachu77769@gmail.com")
만약 사용자가 구글로그인을 다른아이디로 변경하고 싶거나 구글 로그아웃을 하려면 GIDSignIn.sharedInstance()?.signOut() 코드를 호출하면 됩니다.
GIDSignIn.sharedInstance()?.signOut()
4.Naver
1)네이버에서 내앱 만들기
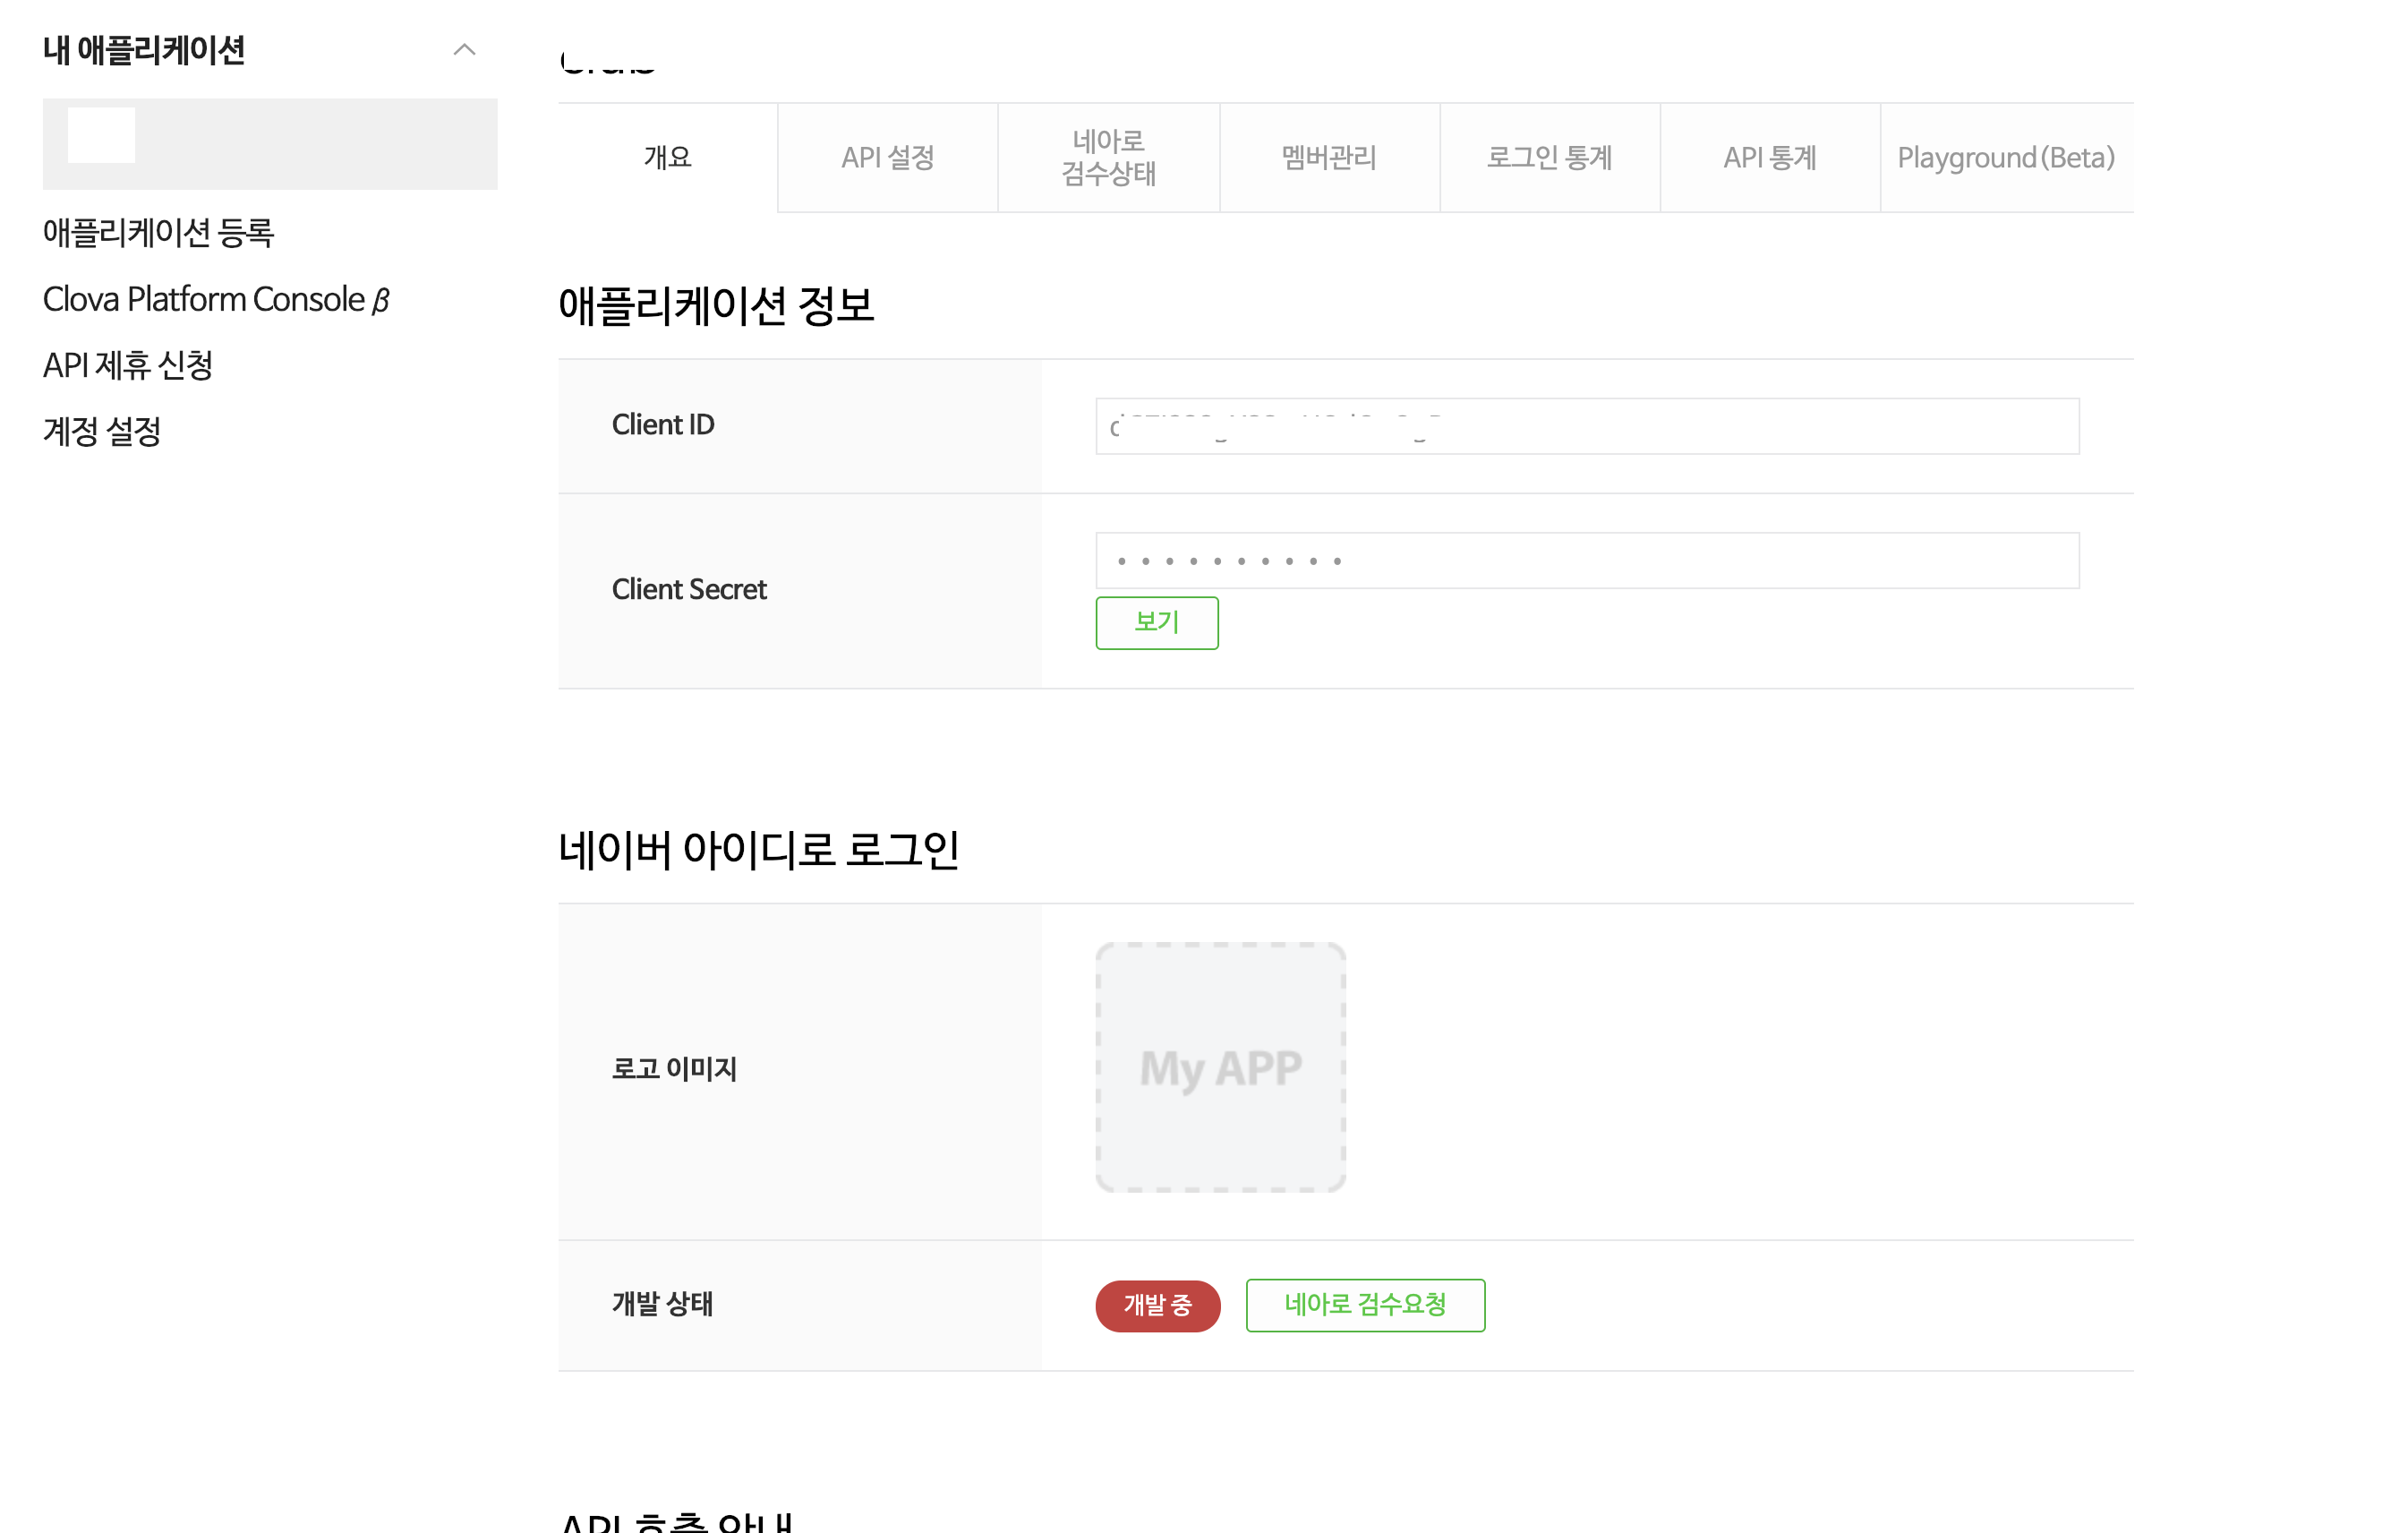
앱을 만듭니다.
Client ID와 Client Secret는 프로젝트에서 사용되니 기억하고 있습니다.

API설정에서 다운로드 URL과 Scheme를 입력합니다.
다운로드 URL은 itunesConnect에서 id를 이용해 id뒤에 적으면 됩니다.
Scheme는 원하는 글자를 적으면 됩니다. (남들과 겹치지 않게 긴 글자로 합니다.)
2)naveridlogin-sdk-ios 설치
2017.11.10부터 SDK를 다운로드해서 설치하지 않고 cocoapods으로 설치가 가능합니다.
iOS 9.0 버전 이상부터 지원을 합니다.
platform :ios, '9.0

pod 'naveridlogin-sdk-ios'
Cocoapods로 naveridlogin-sdk-ios을 install 합니다.
3)info.plist 설정
<array>
    <dict>
        <key>CFBundleTypeRole</key>
        <string>Editor</string>
        <key>CFBundleURLSchemes</key>
        <array>
            <string>naver</string>
        </array>
    </dict>
</array>

<key>LSApplicationQueriesSchemes</key>
<array>
    <string>naversearchapp</string>
    <string>naversearchthirdlogin</string>
</array>
info.plist에 추가를 합니다.
CFBundleURLSchemes는 네이버 개발자 사이트에서 적었는 글자로 합니다.
4)AppDelegate 설정
AppDelegate.swift 파일에서 NaverThirdPartyLogin을 임포트 합니다.
import NaverThirdPartyLogin
application(_:didFinishLaunchingWithOptions:) 함수에 아래와 같은 코드를 추가합니다.
func application(_ application: UIApplication, didFinishLaunchingWithOptions launchOptions: [UIApplication.LaunchOptionsKey: Any]?) -> Bool {
    // Override point for customization after application launch.

    let naverThirdPartyLoginInstance = NaverThirdPartyLoginConnection.getSharedInstance()
    // 네이버 앱으로 인증하는 방식을 활성화하려면 앱 델리게이트에 다음 코드를 추가합니다.
    naverThirdPartyLoginInstance?.isNaverAppOauthEnable = true
    // SafariViewContoller에서 인증하는 방식을 활성화하려면 앱 델리게이트에 다음 코드를 추가합니다.
    naverThirdPartyLoginInstance?.isInAppOauthEnable = true
    // 인증 화면을 iPhone의 세로 모드에서만 사용하려면 다음 코드를 추가합니다.
    naverThirdPartyLoginInstance?.setOnlyPortraitSupportInIphone(true)
    // 애플리케이션 이름
    naverThirdPartyLoginInstance?.appName = (Bundle.main.infoDictionary?[kCFBundleNameKey as String] as? String) ?? ""
    // 콜백을 받을 URL Scheme
    naverThirdPartyLoginInstance?.serviceUrlScheme = "naver"
    // 애플리케이션에서 사용하는 클라이언트 아이디
    naverThirdPartyLoginInstance?.consumerKey = "********"
    // 애플리케이션에서 사용하는 클라이언트 시크릿
    naverThirdPartyLoginInstance?.consumerSecret = "********"

    return true
}
consumerKey와 consumerSecret는 자기꺼로 바꿔서 하면 됩니다.
serviceUrlScheme는 네이버 개발자 사이트에서 적었는 글자로 합니다.
그리고 로그인 또는 공유 액션을 수행할때 SDK에서 네이티브 Facebook 앱의 결과를 처리할수 있게 코드를 추가합니다.
func application(_ app: UIApplication, open url: URL, options: [UIApplication.OpenURLOptionsKey : Any] = [:]) -> Bool {
    guard let scheme = url.scheme else { return true }

    if scheme.contains("naver") {
        let result = NaverThirdPartyLoginConnection.getSharedInstance().receiveAccessToken(url)
        if result == CANCELBYUSER {
            print("result: \(result)")
        }
        return true
    }

    return true
}
scheme.contains의 naver글자는 네이버 개발자 사이트에서 적었는 글자로 합니다.
5)Naver login
네이버 버튼 등을 터치했을때 메서드에
let naverConnection = NaverThirdPartyLoginConnection.getSharedInstance()
naverConnection?.delegate = self
naverConnection?.requestThirdPartyLogin()
NaverThirdPartyLoginConnection.getSharedInstance()의 delegate를 연결한 클래스에
extension ViewController: NaverThirdPartyLoginConnectionDelegate {
    func oauth20ConnectionDidFinishRequestACTokenWithAuthCode() {
        // 로그인 성공 (로그인된 상태에서 requestThirdPartyLogin()를 호출하면 이 메서드는 불리지 않는다.)
        self.naverDataFetch()
    }
    func oauth20ConnectionDidFinishRequestACTokenWithRefreshToken() {
        // 로그인된 상태(로그아웃이나 연동해제 하지않은 상태)에서 로그인 재시도
        self.naverDataFetch()
    }

    func oauth20Connection(_ oauthConnection: NaverThirdPartyLoginConnection!, didFailWithError error: Error!) {
        //  접근 토큰, 갱신 토큰, 연동 해제등이 실패

    }

    func oauth20ConnectionDidFinishDeleteToken() {
        // 연동해제 콜백

    }

    func oauth20ConnectionDidOpenInAppBrowser(forOAuth request: URLRequest!) {
        self.present(NLoginThirdPartyOAuth20InAppBrowserViewController(request: request), animated: true, completion: nil)
    }
}
func naverDataFetch(){
    guard let naverConnection = NaverThirdPartyLoginConnection.getSharedInstance() else { return }
    guard let accessToken = naverConnection.accessToken else { return }
    let authorization = "Bearer \(accessToken)"

    if let url = URL(string: "https://openapi.naver.com/v1/nid/me") {
        var request = URLRequest(url: url)
        request.httpMethod = "GET"
        request.setValue(authorization, forHTTPHeaderField: "Authorization")

        URLSession.shared.dataTask(with: request) { (data, response, error) in
            guard let data = data else { return }

            do {
                guard let json = try JSONSerialization.jsonObject(with: data, options: []) as? [String: AnyObject] else { return }
                guard let response = json["response"] as? [String: AnyObject] else { return }
                let id = response["id"] as? String
                let email = response["email"] as? String
                let name = response["name"] as? String
                let nickname = response["nickname"] as? String
                let profileImage = response["profile_image"] as? String
                let birthday = response["birthday"] as? String
                let gender = response["gender"] as? String
                print("id: \(id)")
                print("email: \(email)")
                print("name: \(name)")
                print("nickname: \(nickname)")
                print("profileImage: \(profileImage)")
                print("birthday: \(birthday)")
                print("gender: \(gender)")
            } catch let error as NSError {
                print(error)
            }
            }.resume()
    }
}
id: Optional("*******")
email: Optional("pikachu987@naver.com")
name: Optional("김관호")
nickname: Optional("pikach****")
profileImage: Optional("https://ssl.pstatic.net/static/pwe/address/img_profile.png")
birthday: Optional("06-21")
gender: Optional("M")
로그아웃 하려면 아래 코드를 넣습니다.
로그아웃 하면 네이버으로 이동이 되지만 바로 다시 앱으로 돌아옵니다.
로그아웃하지않고 다시
requestThirdPartyLogin()를 호출하면 네이버로 이동하지 않고oauth20ConnectionDidFinishRequestACTokenWithRefreshToken딜리게이트 메서드가 호출이 됩니다.
NaverThirdPartyLoginConnection.getSharedInstance()?.resetToken()
연동해제 하려면 아래 코드를 넣습니다.
연동해제를 하면 다시 네이버 로그인을 하게됩니다.
NaverThirdPartyLoginConnection.getSharedInstance()?.requestDeleteToken()
gender, birthday, email 등의 정보는
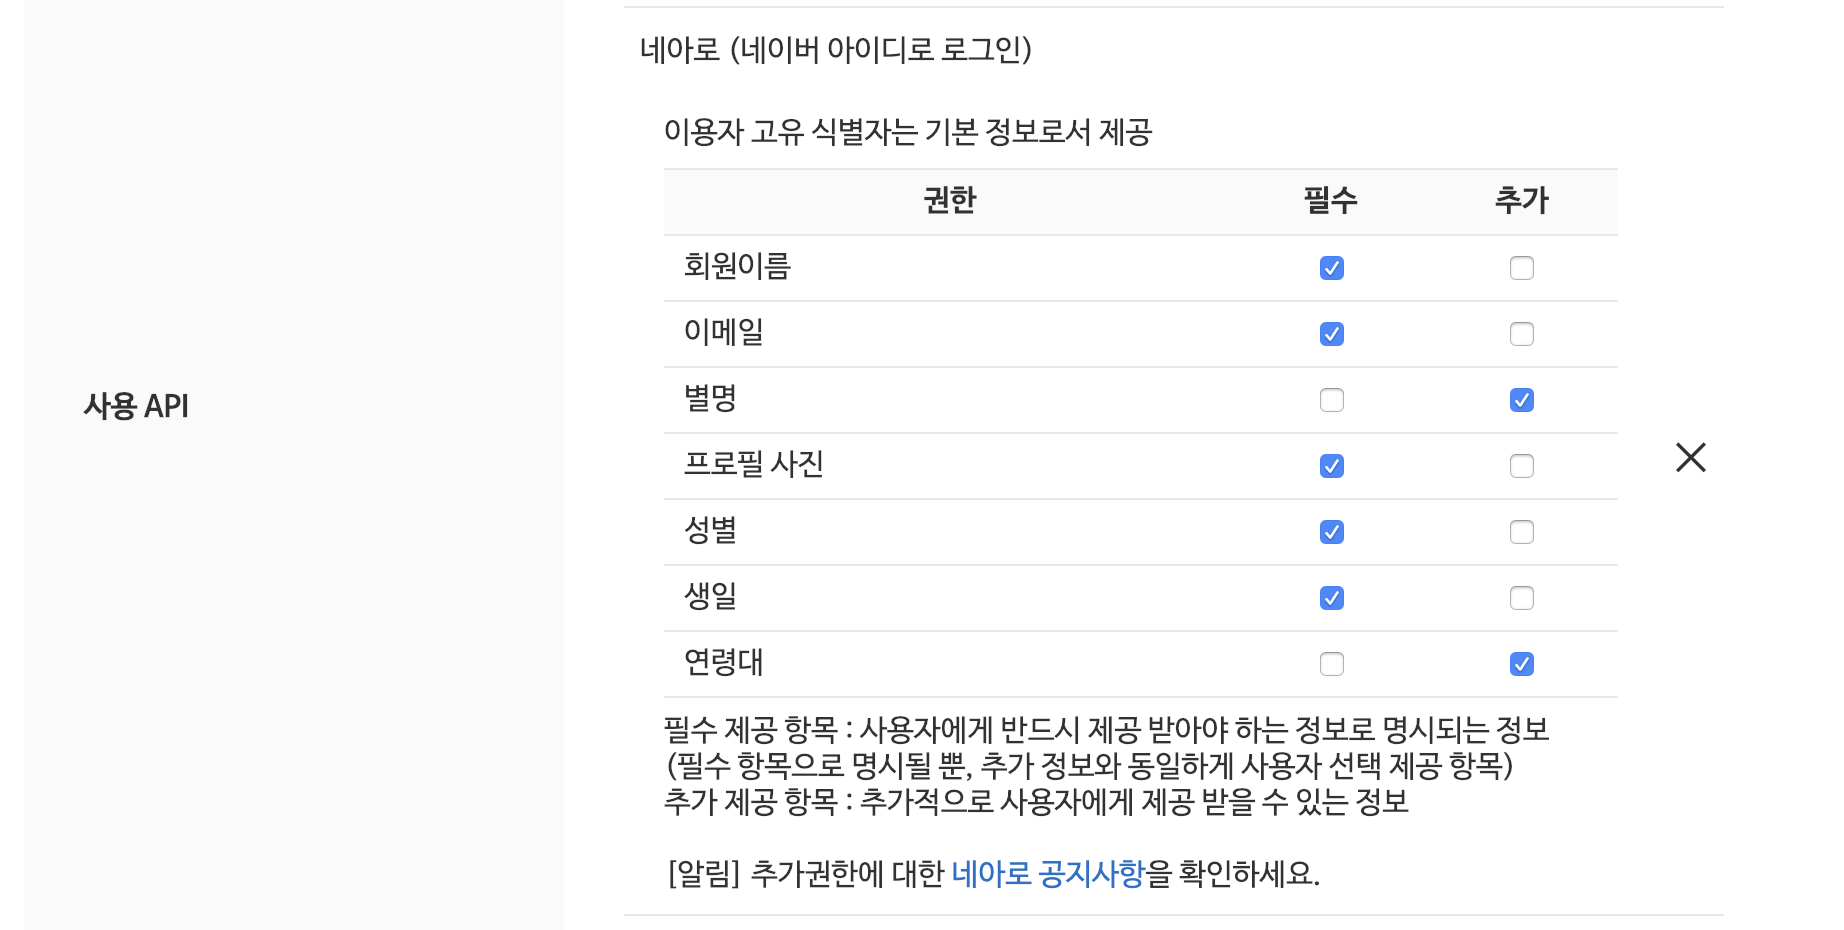
API설정에서 권한을 선택하셔야 일반 사용자들이 사용할수 있습니다.
5.All Code
Facebook, Kakao, Google, Naver 의 sns 연동 정리